How to Setup a Python Development Environment
Author: Rez | Published: January 18, 2024
Introduction
In this blog post we will:
- Set up a local development file system which enables easy backup of all dev work.
- Create a standard Python virtual environment called ‘dev’.
- Provide an easy and accessible access to Jupyter notebook cheat sheets.
- Learn how to clone and branch a git repo for working on.
- Configure PyCharm IDE correctly to assist in development of a Django project.
Setup local development file system
When setting up your Python development environment it's important to use a simple file structure on your local machine (pc/laptop).
I use this for my project folders:
C:home/dev/pycharm_projects/project_name
And this for my Python virtual environments:
C:home/dev/python_envs/project_name
Some engineers will just keep projects and Python environments inside the PyCharm main application folder. I like to separate this out and store it in a dedicated 'dev' folder. I do this so it is easy for me to create a backup of all my dev work.
To create a backup I simply copy my dev folder to an externally encrypted veracrypt vault once a month and place the date of the backup in the filename.
For example, if I created a backup of my dev folder today, I would name the file:
Dev_bkup_18.01.2024
Activate Python ‘dev’ Venv and open Jupyter notebook cheat sheets
If you do not already have a Python virtual environment called ‘dev’, create one now. Open a Conda terminal window and type the following commands:
conda create -n dev python=3.8
conda activate dev
Activate your Conda ‘dev’ python environment whenever you sit down to do some development work. This safeguards against you accidentally installing python packages to your main OS python installation.
Download, unzip and copy this folder to your local ‘dev’ folder, it is a collection of Jupyter notebook application cheat sheets which you can use to help you when developing.
https://github.com/www-codeblock-io/company_resources/blob/main/jupyter_notebooks.zip
Open a new Conda terminal window. Install jupyter notebook inside your ‘dev’ python virtual environment if not already done so.
conda update -n base -c defaults conda
conda install -c conda-forge notebook
Open a new Conda terminal window and navigate to C:home/dev/jupter_notebooks.
Run an instance of a jupyter notebook.
conda jupyter notebook
The above command will open jupyter notebook in a browser window where you can now navigate to the Jupyter notebook cheat sheets folder and use them whenever you need to find handy command prompts etc. Add a new jupyter notebook cheat sheet whenever you learn a new application.
Clone & Branch a git repo to work on locally
Log into CodeBlock.io github (https://github.com/www-codeblock-io) and read through the repo code you are about to work on.
Open a local Conda terminal window.
Create a new Conda virtual environment called 'project_name’ (name the Python virtual environment the same as the main project name).
conda create -n project_name python=3.8
Activated venv ‘project_name’’.
Make sure you are now in the venv ‘project_name’.
Move into the project directory that has the requirements.txt file then in the Conda terminal install by using the command:
conda install requirements.txt
If this fails, install manually using:
pip install <package name>
or
conda install <package name>
Navigate into your PyCharm folder (where you keep all of your PyCharm project folders).
Clone the main git repo and create a new branch, it’s handy to use your own name as a prefix and then a concise description of what work you're doing on the branch, for instance ‘rez_search-optimisation’. We create a new branch to work on so as not to affect the original repo main branch code.
Once changes have been made on your branch, you can raise a merge request for the owner of the repo to confirm and merge the changes to the main branch if happy.
Setup PyCharm Project
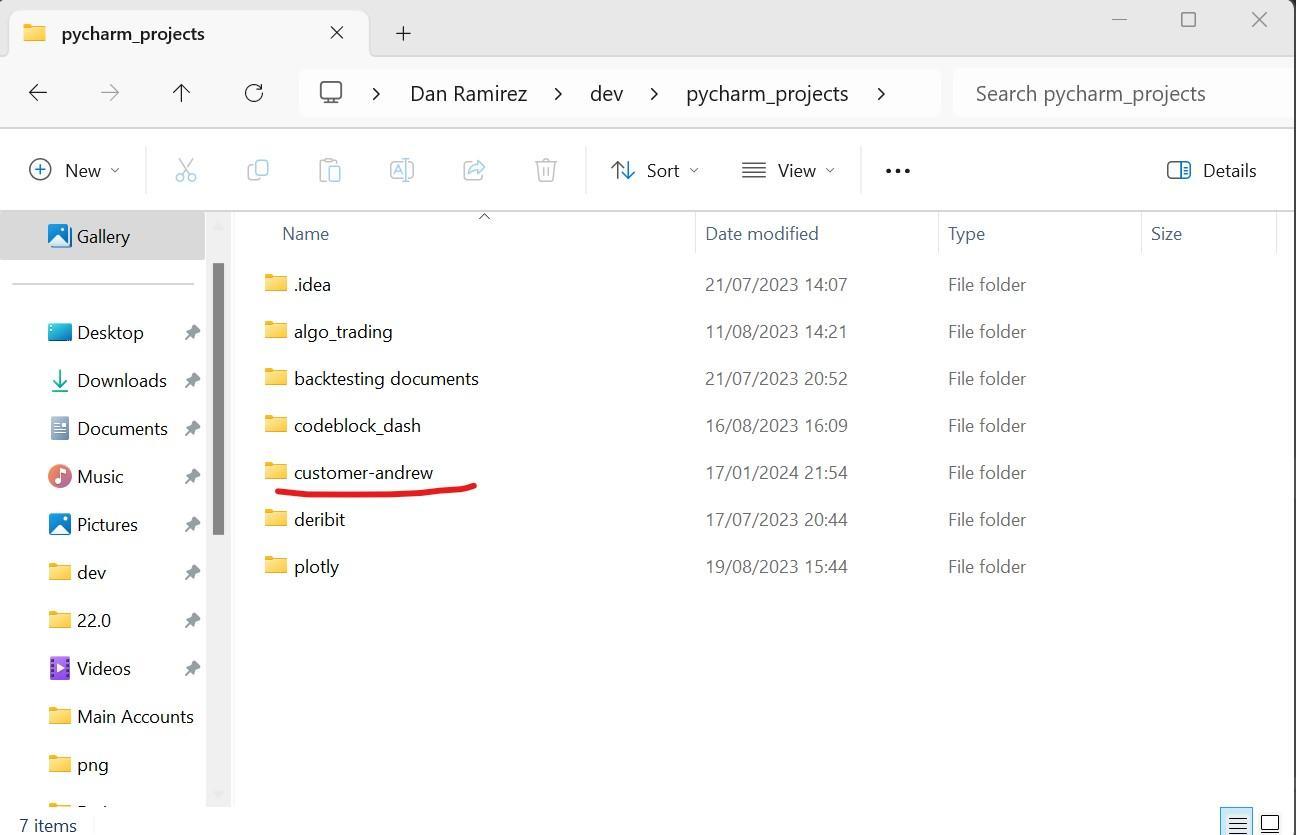
Navigate to the Pycharm folder and open the git repo folder you just cloned and branched. In this example I'm working on a repo called ‘customer-andrew’.
First delete the .idea folder as this would be the main branch owner's Pycharm IDE file settings which may be different to your PyCharm settings.
Delete the .idea folder.
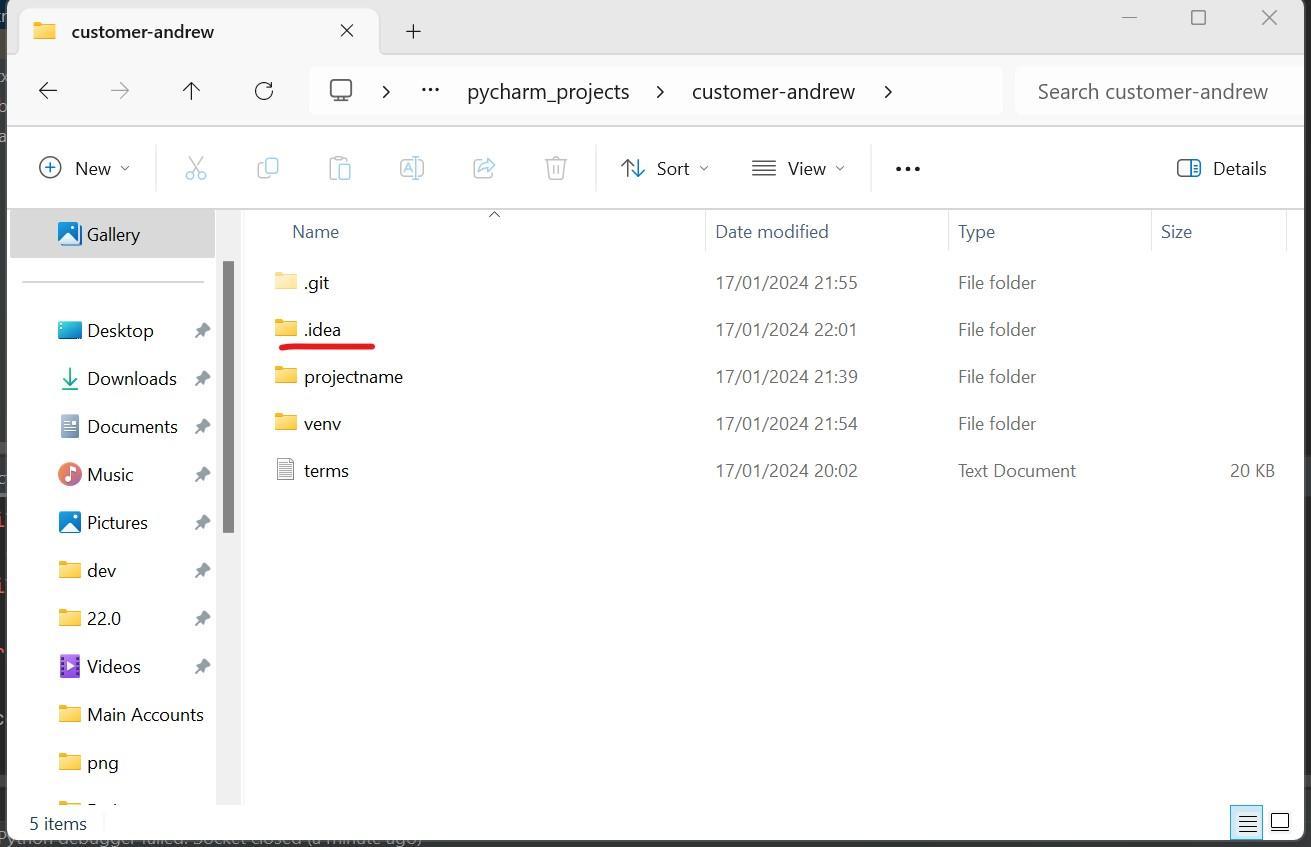
Working directory should now look like this…

Open PyCharms and select ‘Open’, navigate to the project parent folder.
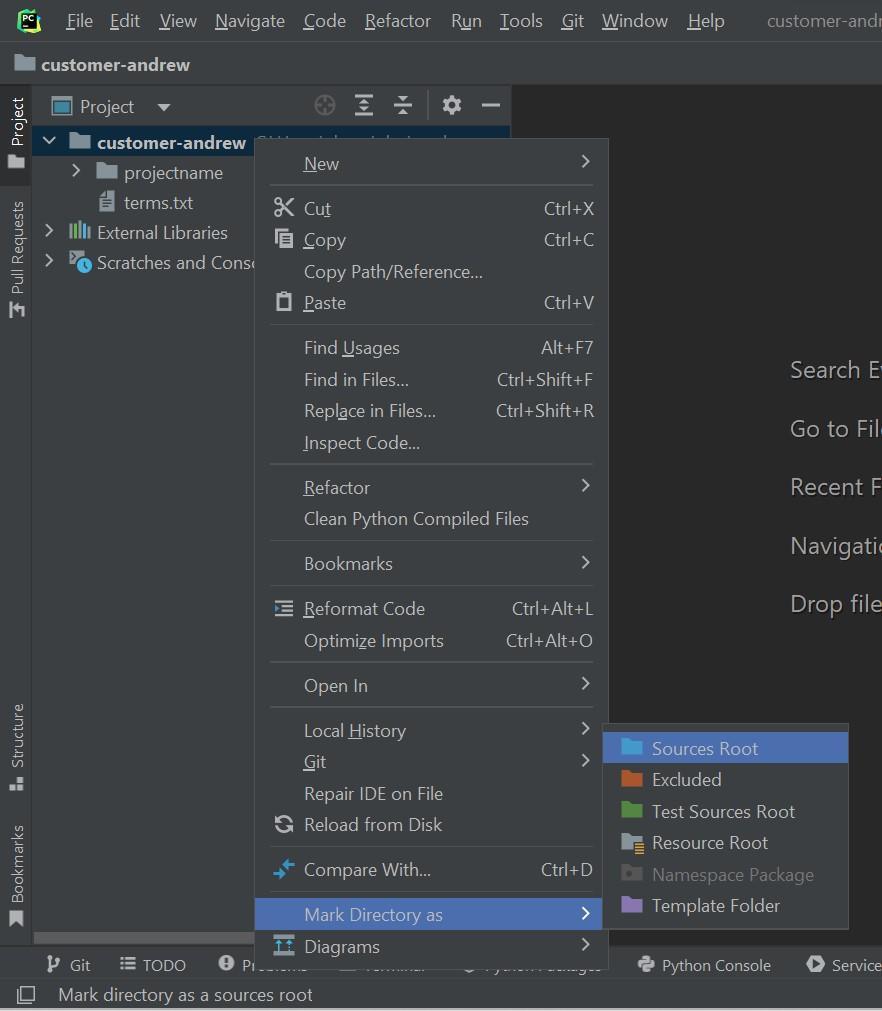
Once the project has loaded in PyCharm, right click the project parent folder and select ‘Mark directory as’ > ‘Sources Route’. Do this to all the main project folders as this helps PyCharms to locate the important files and folders.
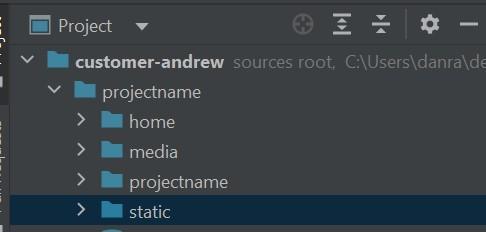
All the main project folders should be now blue.
Select the new Python virtual environment you just created for this PyCharm project. You do this by clicking on File>settings>Project>python interpreter>Add local interpreter.
Select the python venv you just created and double check all of the required dependencies are listed in the package list.
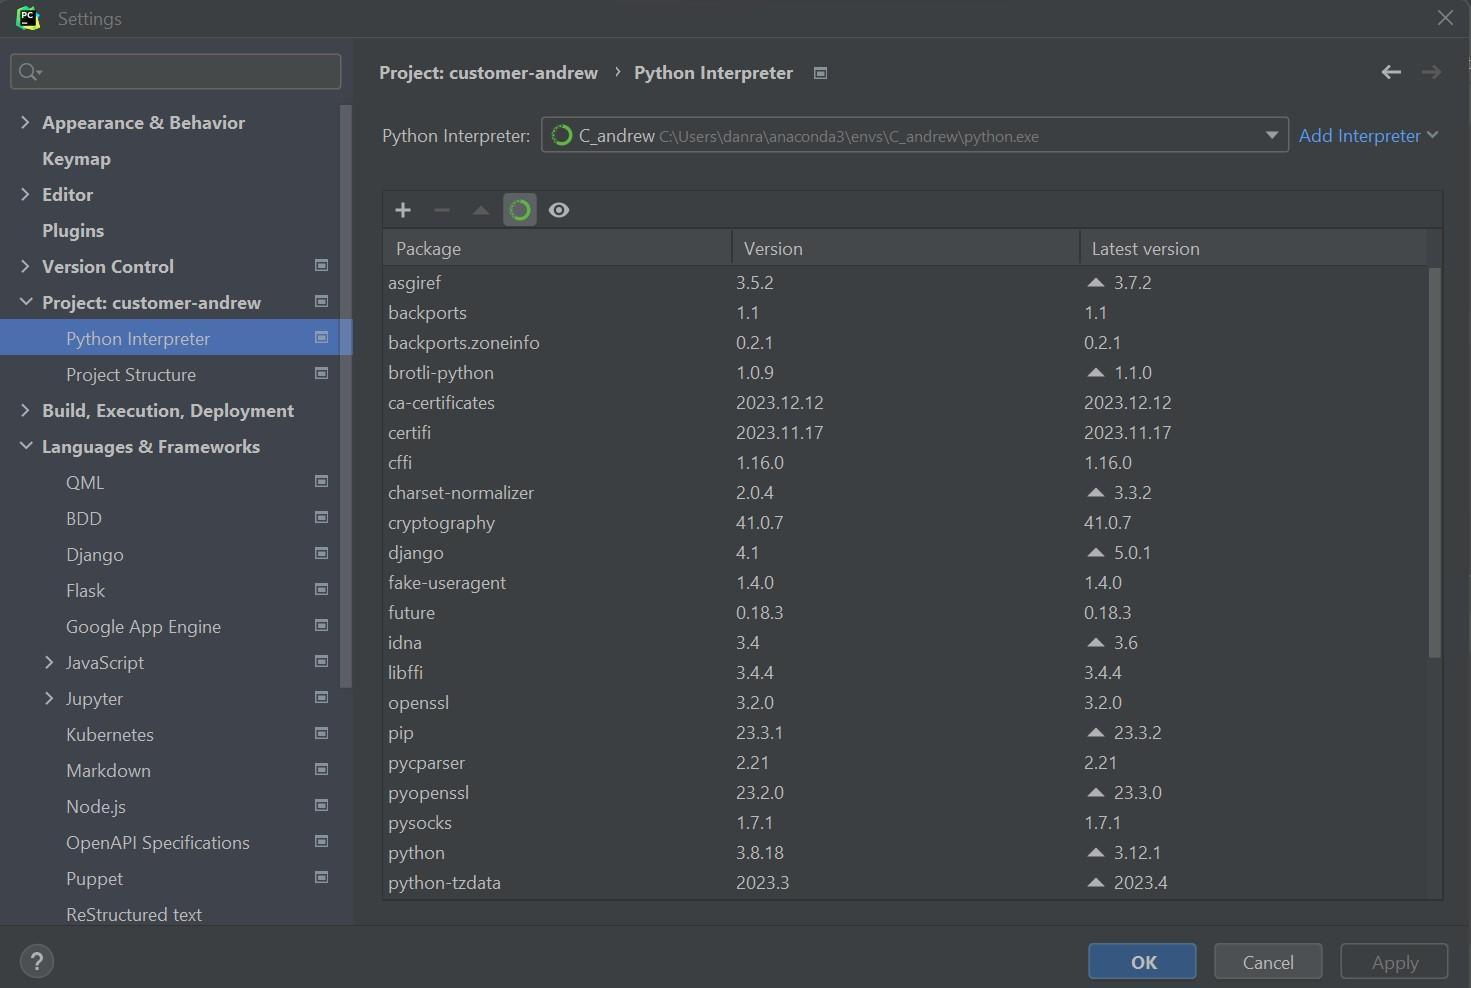
Now we have configured the PyCharm project to use the python virtual env we have just created and allow us to run and debug the website directly in PyCharm which saves us having to switch between Terminal and IDE windows.
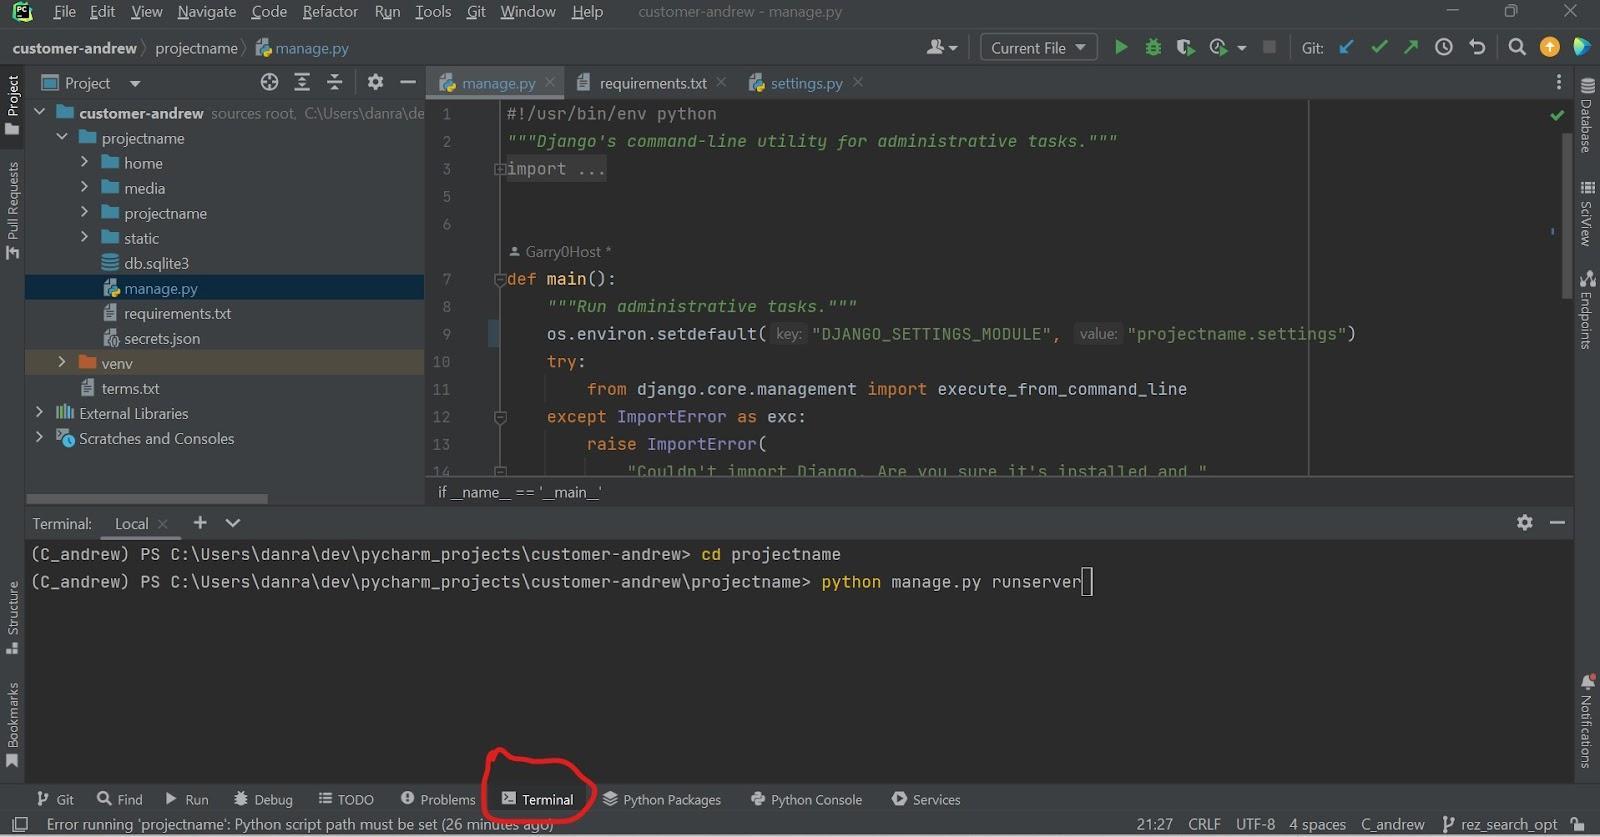
You can now run the project code locally in PyChams and debug locally using its built-in Terminal window. This is handy as you can press the small plus icon above the terminal window and it will immediately open a new terminal window with your python venv already live. You can have multiple instances of the venv running at the same time. And the terminal also remembers all of your previous command prompts… All of this saves programming time.
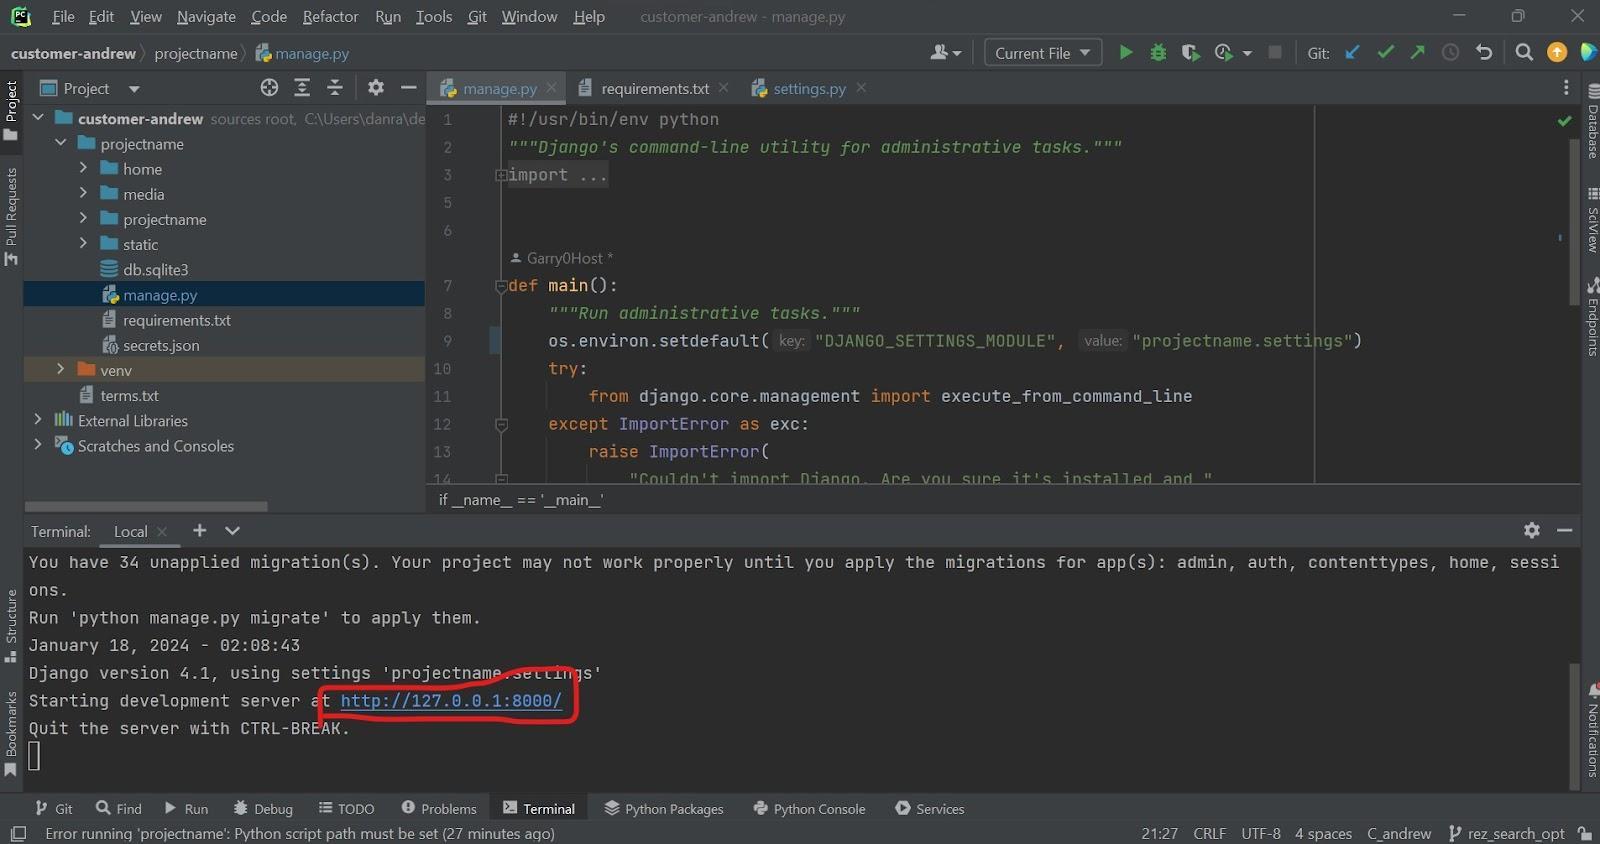
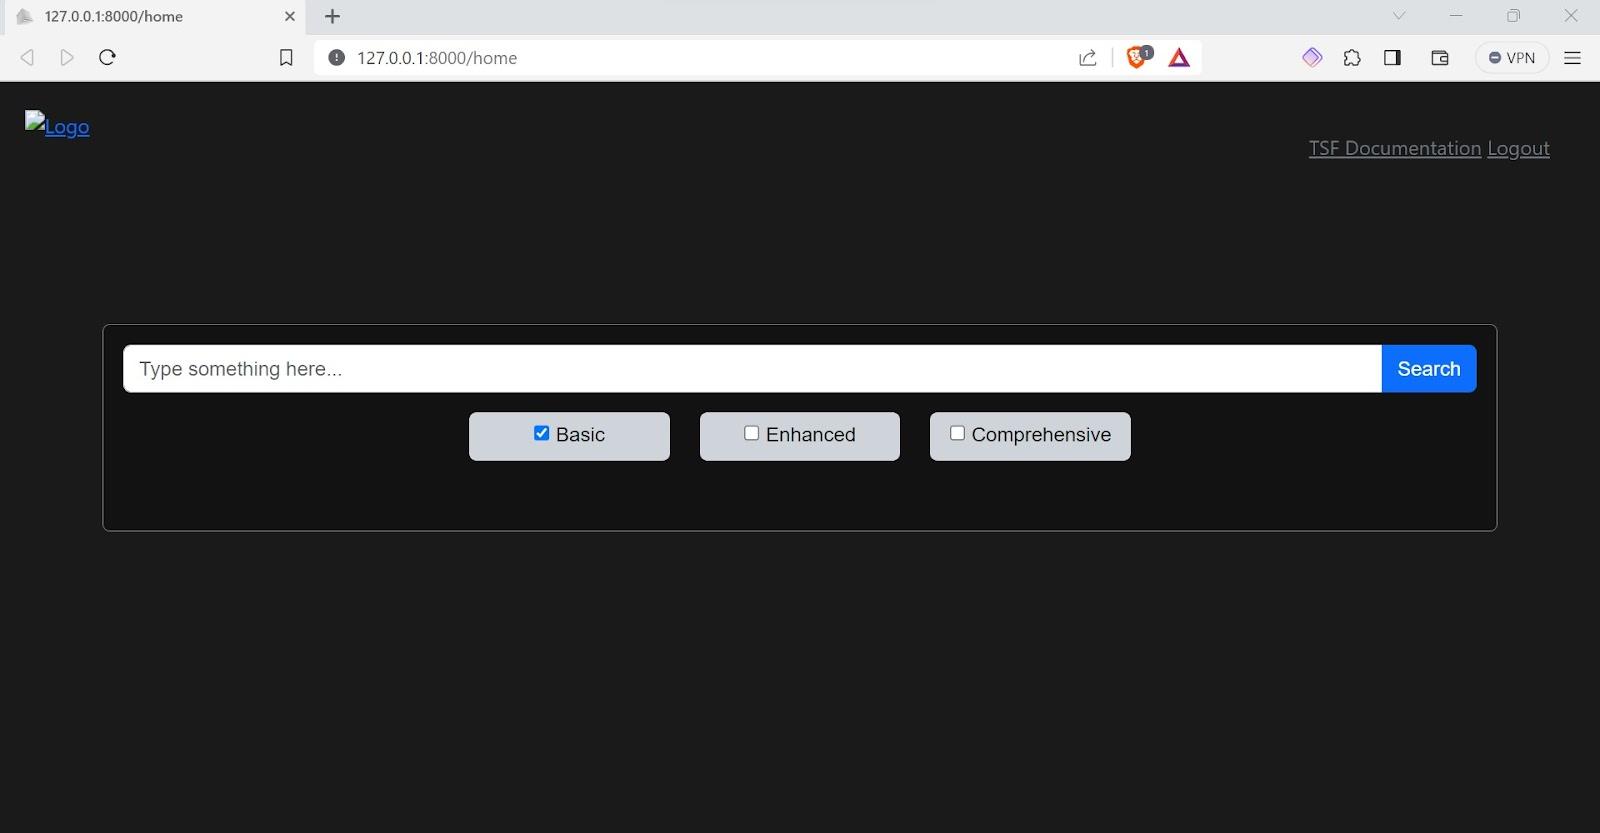
This particular project is a Django website which is now running locally on http://127.0.0.1:8000
Run and debug your Django application with PyCharm
If you are working on a Django project, always manually starting and stopping the development server from the PyCharm terminal screen gets a bit annoying over time. Luckily we can create a run configuration within PyCharm to start and stop the development server automatically.
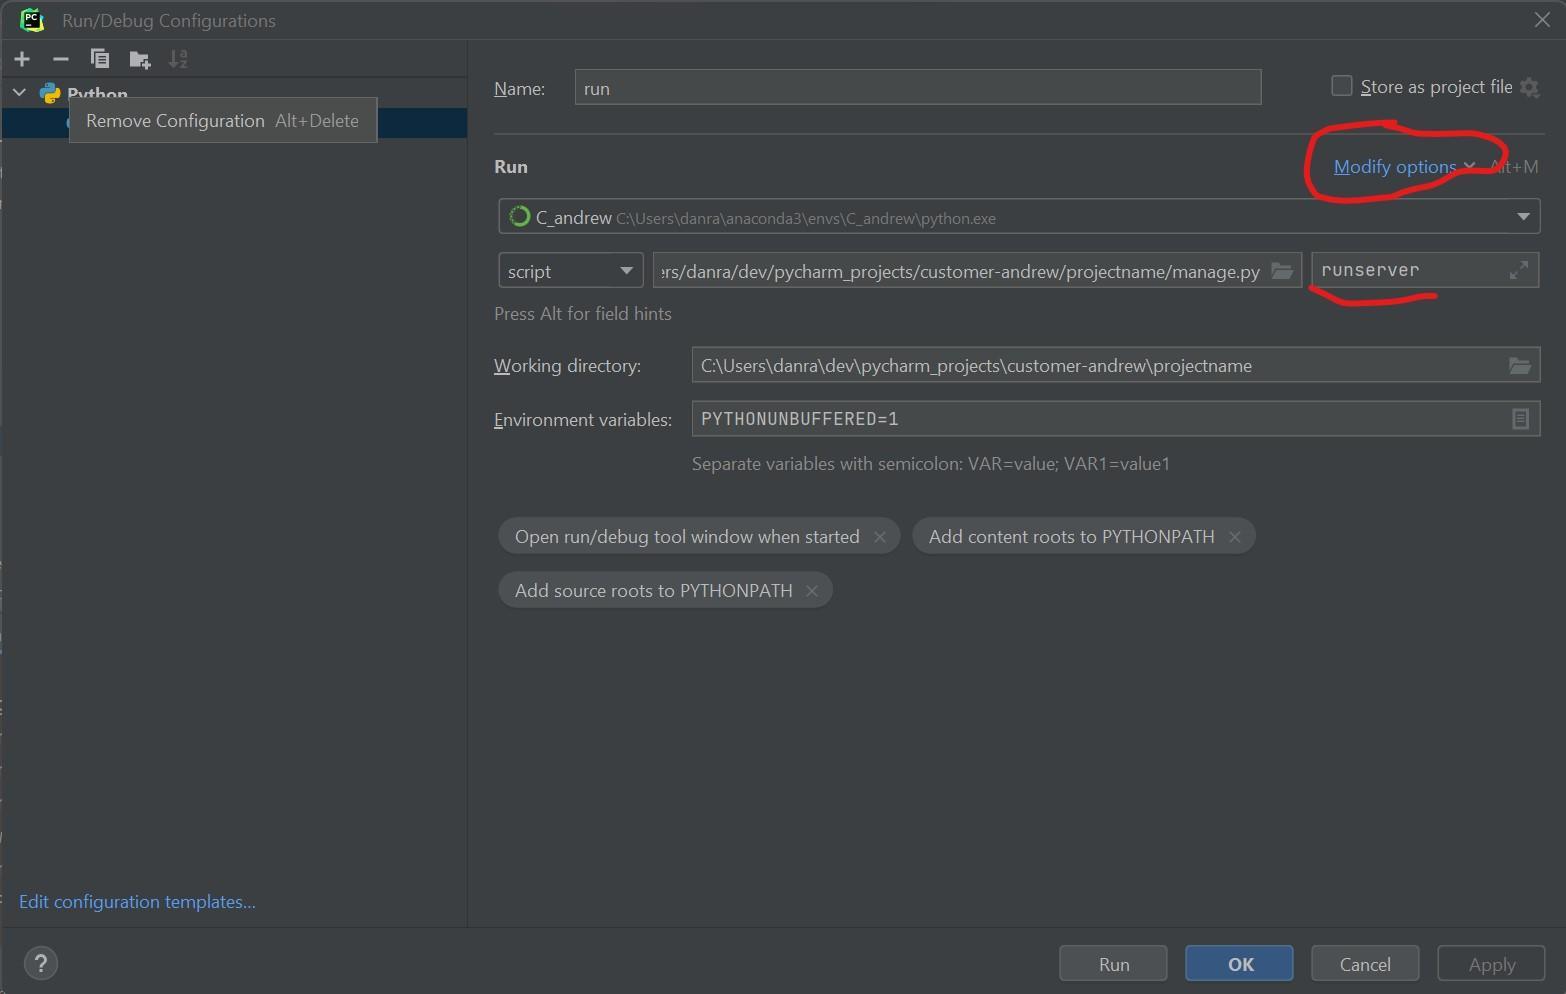
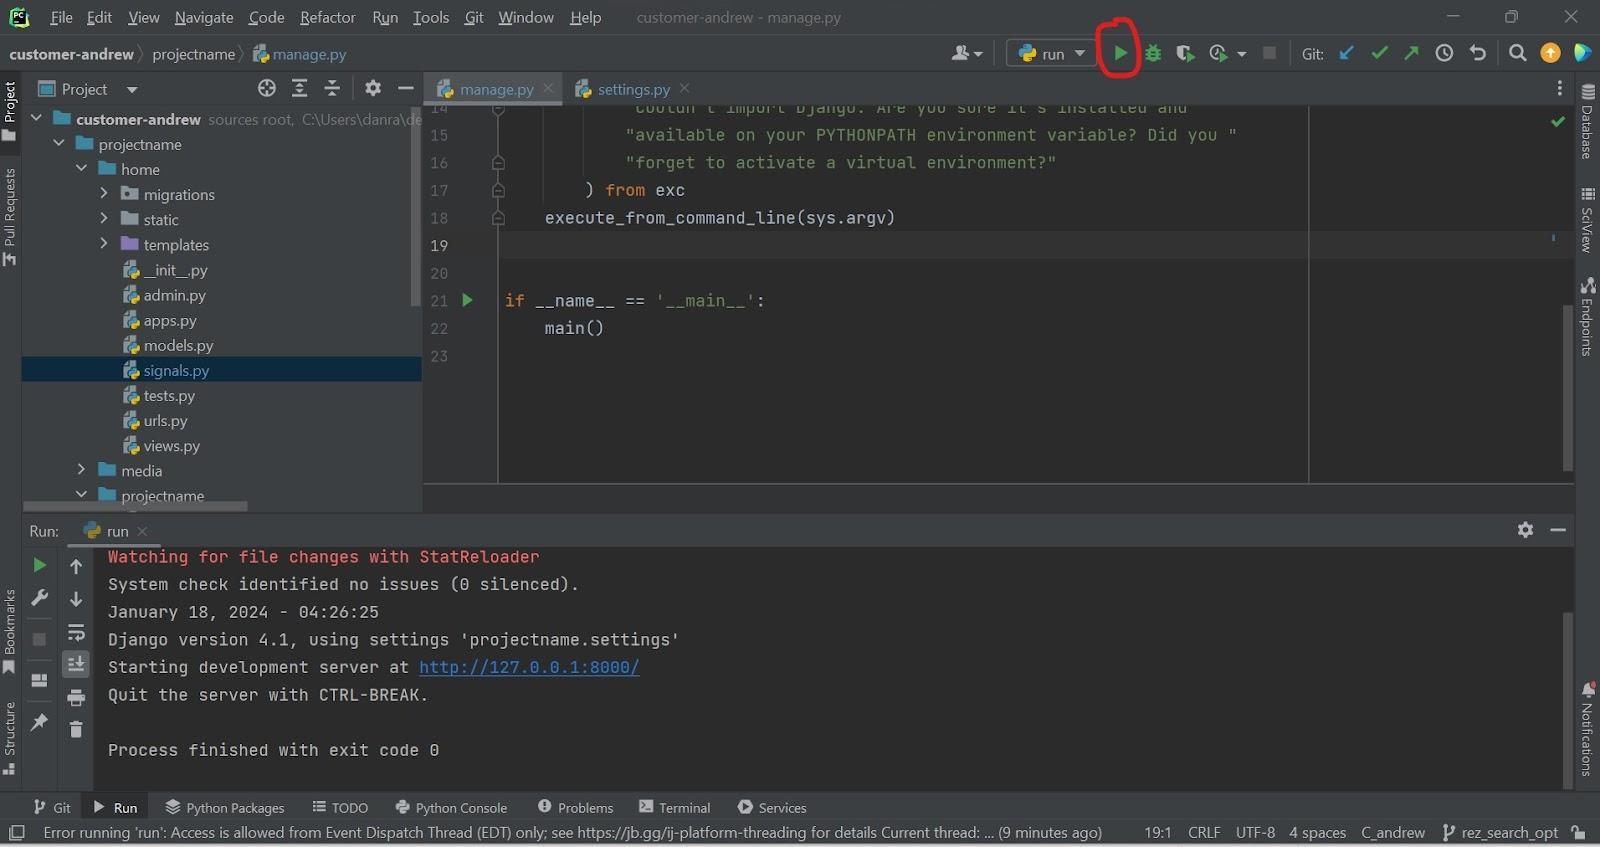
From the PyCharm program menu, select Run → Edit Configurations…Click the button with the plus-sign to create a new run configuration and select Python from the list of templates. On the newly appeared dialog, enter a name for the run configuration. This could simply be the same as the Django app or the word ‘run’. Next, configure the Script path. Browse and select the manage.py file inside the Django project directory. Finally, enter runserver in the Parameters edit box and click the OK button. (you may need to click on modify options to show the correct setting fields).
To run and test the Django application(s) inside your Django project, you can now simply click the green Play button on the PyCharm toolbar. You’ll see in the Run window that PyCharm automatically started the development server for us. Once running, you can stop it again by clicking the red Stop button on the toolbar.
You can add further script shortcuts using the same process. You can think of this button/feature like a Cron job or a Bash script. Again it's another time saving feature that PyCharm offers if you find yourself repeating command line text.
Besides just running your Django application, PyCharm can also debug it. Debugging your Django application with PyCharm enables you to set breakpoints, view variable values and step through your code line-by-line. A must have feature for tracking down problems in your code. To start a debug session of your Django application, simply click the green Bug button on the PyCharm toolbar. It is located right next to the green Play button:
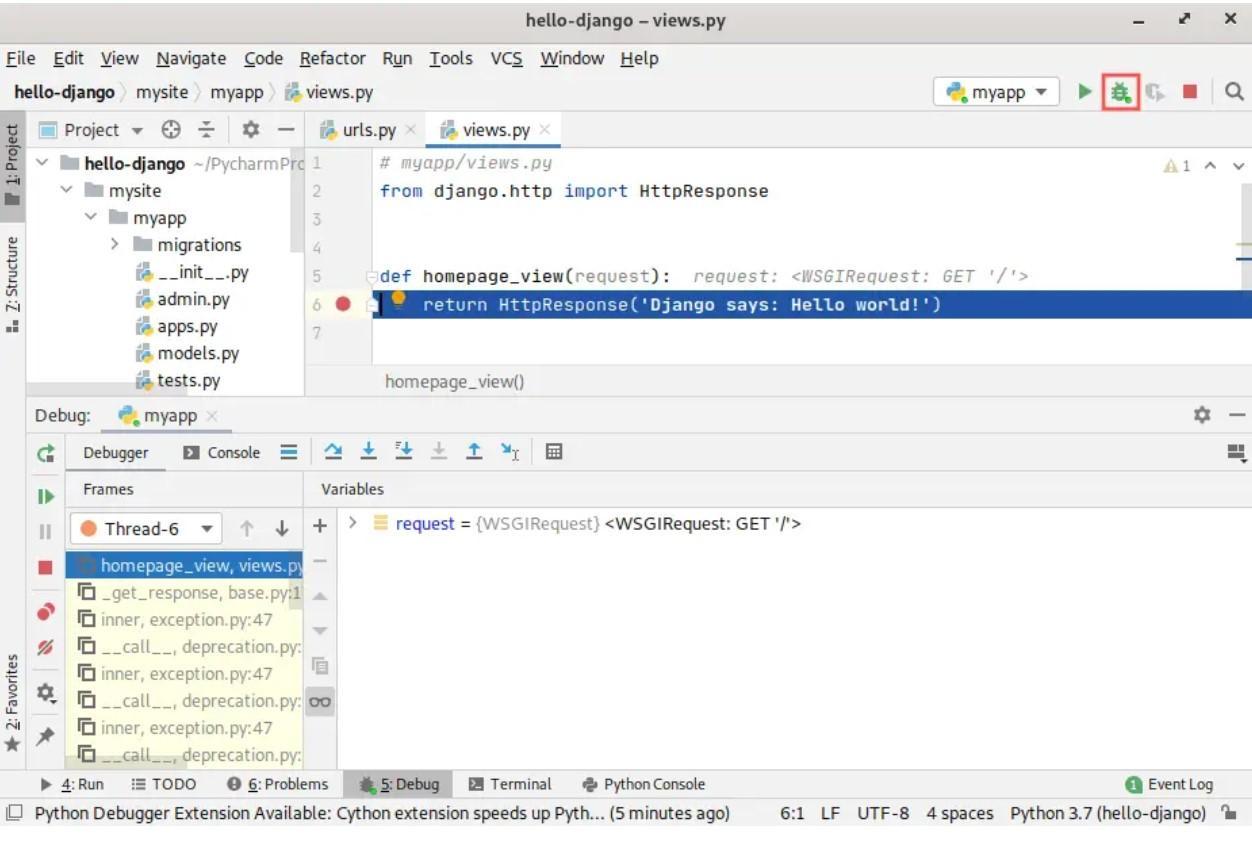
To test this out, you could set a breakpoint on the following line inside views.py:
return HttpResponse('Django says: Hello world!')
You do this by clicking in the gray gutter in the editor on the left side of the line. A red dot will appear, indicating that a breakpoint is active for that line. If you want to remove the breakpoint, simply click there again on the red dot. If you now start a debug session of your Django application, PyCharm automatically halts the application when it reaches this line of code. Once halted, you can inspect variable and parameter values and step through the code one line at a time.
Now we can add features to the project, debug or refactor the code, without having to leave the PyCharms IDE. This becomes our complete Python development environment.
At the end of a coding session or when we have made a certain amount of changes and wish to save these changes and upload them to the github repo (on the new branch we created) we can simply use PyCharms built in Git support, using the Git (pull/commit/push) buttons on the top right corner.

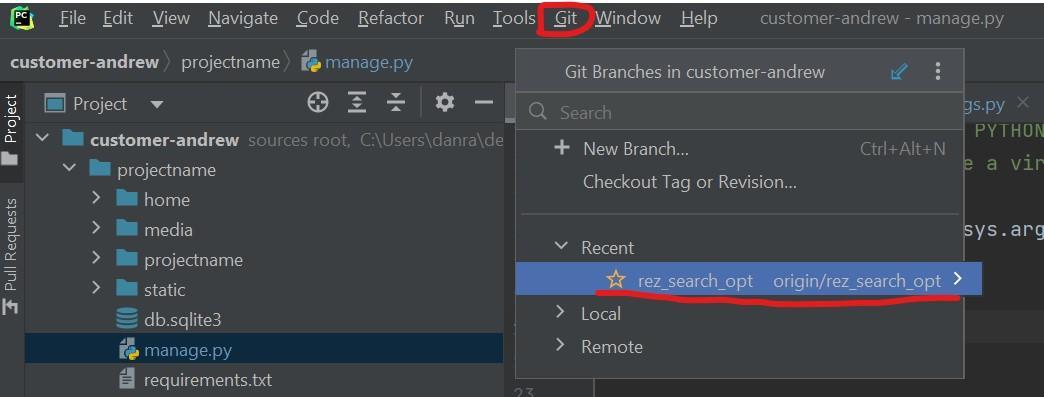
Just make sure that PyCharms is on the correct branch, you can check this by clicking on the ‘Git’ tab at the top left and selecting ‘Branches’ the current git branch will have a flag/star next to it.
This is very important as we don’t want to be committing to the Main repo branch until the changes have been checked and signed off by the repo owner.
Conclusion
You now have a dedicated ‘dev’ folder in your local home directory that stores all of your PyCharm project folders and Python virtual environments. You also have a handy Jupyter Notebook folder full of cheat sheets and a safe and structured way of working on a shared project git repo using the added features of the PyCharm IDE.
Explore More articles
Subscribe to our Newsletter
CodeBlock - Empowering Your Digital Presence